Showing posts with label kiln(s). Show all posts

Thursday, December 20, 2012

What cones are and what they do

            In essence, cones are a way of labeling a certain amount of "melted-ness" of ceramic materials. Pyrometric cones are specially formulated from glassy materials to melt at a certain point based on time and temperature - thus they melt similarly to the way that other ceramic materials do in the kiln. 


            The cones themselves are constructed like little pyramids, and they bend over when they are "done." Thus we can use them to measure whether a kiln has fired appropriately for the clay and glazes we are using. The thermocouples in the kiln do measure temperature, but since both time and temperature combine to create what is called "heat work," the temperature doesn't necessarily tell you all you need to know about the firing. 
            These are cones that have not been fired yet. From left to right, they are cone 5, cone 6, and cone 7. These are the cones I use in a glaze firing. 


            Cones are numbered from cone 022 (coolest) to cone 15 (hottest). (Actually they do go hotter, but no studio potter would use the upper limits beyond cone 13 or so.) Cone 6 and Cone 10 (most often used) are around 2232 F and 2350 F respectively. So anytime I say something is fired to cone 6, I'm saying I fired it to around 2232 F, but with pyrometric cones to measure the heat work. Saying "cone 6" is more accurate than the temperature for the purpose of knowing how the clay and glazes will react. 
            Here is an example. In the picture below, you see two cone packs, both with cones 5, 6, and 7 (from left to right). The one on the left was in the first test firing of my new kiln, and the one on the right was in the kiln during the latest firing. 


            The cone pack on the left shows a kiln that has fired to cone 7, and the one on the right shows a kiln that has fired to about cone 5 1/2. You can tell because the cone 7 on the left cone pack has curled over to about halfway, and the cone 6 on the right cone pack is nearly, but not quite, to halfway while the cone 5 in that cone pack is very floppy. 
            Now, what was the difference in temperature here? Cone 6 is "supposed" to be 2232 degrees Fahrenheit. The kiln fired to 2236 F in the firing represented on the left, yet it shows as cone 7.  This is because of the heat work I mentioned above - the firing schedule must have been slow enough near the peak temperature to produce more heat work, and thus the cone 7 began to bend despite the actual temperature. According to the kiln, this was a perfect firing. According to the cones, the kiln overfired. The cones are right. If the test tiles from this post had been in that firing, the glazes would have been even runnier.
            So what did I change for the next firing? I fired to a peak temperature of 2180 F rather than 2236 F. 2180 F is within the range of cone 5. I also programmed the kiln with a slower rate of climb near the end of the firing, and a fifteen minute hold at peak temperature. These adjustments resulted in the cones that you see on the right. As far as I'm concerned, this was a perfect firing. The cones are right where I want them, because the glazes and clays I use are formulated for cones 5 - 6.
            Pyrometers are super devices, and they can be helpful during firings. But cones are the best way to judge the heatwork during and after a firing. You can fire a kiln without a pyrometer, but it is very hard to do without cones. I have the luxury of a programmable kiln, so I can theoretically just tell it what to do and leave it alone. But the cones offer me an extra diagnostic tool, not just to know when something goes wrong, but also to know when things are going well, and to give me the option to observe the end of the firing and shut off the kiln at just the right time if I so choose. 

Thursday, November 22, 2012

First bisque!

            As soon as I was able to unload the test firing and assess the results, I loaded the kiln up for a bisque! This was much more exciting to me because I was able to put actual work in the kiln... it's more fun to fire my pieces than to fire a couple cone packs. The bisque was a success, too. I made some test tiles out of the three different clays I'm using, and when I do my first real glaze firing they'll be in there with glazes on them. I'll be posting pictures here with the results for all to see.
            For now, here are some pictures of bisqued work. First shelf:


            Second shelf:


            Some little dragons:


            And a cup with a cuttlefish that I'm particularly happy with:


            I think that this cuttlefish is going to be pale green, and the water around him will probably be a darker green. I also think I'm going to make a bunch more cups, and likely other dishes, with cuttlefish in this style on them. I really enjoyed making the little guy, so it would be fun to make him some friends.

Test firing!

            The first firing of the kiln was successful! I had a lot of fun playing with the controller to practice programming it. The controller is very easy to operate, and I feel that even if I were to lose the manual I would be able to program the kiln to do what I want just fine. The controller has two "modes," one where you can choose a pre-programmed firing schedule, and one where you can program your own firing schedule. For the test firing, I went with a pre-programmed cone 6 firing. This is what cone a normal glaze firing would be for the clay I'm using.
            I was fairly satisfied with the test firing. One thing I was a little worried about for the first firing was that the kiln draws a lot of power, and the house has an old electrical setup, and thus not a whole lot of power available. I was not sure prior to the first firing how using power in the house would be affected by the firing of the kiln. The lights do dim whenever the elements switch on, so there's a sort of flickering effect throughout the firing, but it's not severe enough to be worrisome. At some point in the future I might get the electrical service to the house upgraded, especially if I want a bigger kiln, but for now it's fine. 
            I used pyrometric cones to check on how the kiln fires. I used cones 5, 6, and 7, since I was aiming for cone 6. The thing about cones is that they don't just melt at a certain temperature, but rather once they've absorbed a certain amount of heat. (Yes, these two things are different, for the uninitiated.) So the kiln can fire to a certain temperature according to the pyrometer, yet not bend the cone for that temperature. The opposite happened in my test firing: it seems to have been pretty solidly a cone 7 firing, despite that the final temperature reached was within "cone 6" range. (This is not terribly unusual. The kilns I used at Simon's Rock often over fire by a cone, or at least they did when I was there.) 
            So I don't think I want to use that firing program when I actually have glazed work in the kiln. It probably wouldn't have horrible effects, but the clay and glazes I'm using are formulated for cone 5/6, so over firing them is less than ideal. The clay should be fine, but the glazes will likely be a bit runny at cone 7. There are a few things I could change to fix the problem, but I think the easiest one is to make my own program, and ask it to fire to cone 5 instead of cone 6. If it really does fire to cone 5, that's fine, and if it fires to cone 6 we'll still be good to go. 


Thursday, November 15, 2012

Finally, the kiln is installed!

            It seems as though each step involved with getting the kiln and getting it installed took an extra couple of weeks beyond my original estimate. But at last, we are wired up and ready to go!
            The electrician came this morning and installed the kiln. I'm going to do the test firing tonight, and if all goes as planned, then I'll finally be able bisque fire all the lovely pots and dragon sculptures that are hanging around the house. And then I'll be taking off to visit my family for Thanksgiving. I don't think I'll have enough time to push through a glaze firing before then, but we'll see how it goes!
            After Thanksgiving, things will get super extra busy around here, and I expect to be firing often to get your rewards out as soon as possible. I have a glossy translucent red glaze that looks promising. Many of you requested red, so this particular glaze is of special interest. I have a number of greens to test as well. I'm still deliberating about some of the other glaze options. It's hard to choose, because I want to try everything! Thanks to my backers from the Kickstarter project, I can try out more glazes than I originally planned to, since we hurtled past the goal and kept going. Hooray!

Tuesday, November 13, 2012

Throwing big

            This is the reason it is more important to me to have a kiln that is wide than one that is tall:


            This bowl is 12.5 inches in diameter, my biggest bowl yet! (Although not my largest thrown object.) My kiln is 28 inches wide, so I'm planning to keep working up until I can barely fit them in the kiln. I'm very pleased with this bowl, and I could tell when I was throwing it that I wasn't pushing my limits - it was easy. Sometimes when I'm trying something new with throwing, the clay just seems to know what I want from it, and that was the case with this piece. I love throwing bowls, so I couldn't be more delighted that I'm already capable of expanding my repertoire to include extra large ones. 
            I had Mr. Riverdragon take some pictures while I was throwing so you could get a more complete experience of the event.


            Next step for this bowl is drying slowly to leather hard, then trimming. Once I've trimmed it, I'll be carving a ripply pattern in the space between the two lines on the inside. I have my eye on a green glaze called "Seaweed" that looks like it would run and drip nicely over such a pattern. 

Saturday, November 3, 2012

The electrician is coming! The electrician is coming!

            He's coming next week. He says hopefully Monday, so the kiln could be firing as soon as Monday afternoon! I've been perusing the user manuals that came with the kiln, and they say that I should do a test firing to cone 6 as the first firing. It says that there are things left over from the manufacturing process that will need to burn off in the first firing that would affect any glazes in the kiln, possibly in unpleasant ways. So the first firing will actually be really boring - assuming everything goes as planned - since there won't be any pretty pots for me to take pictures of afterward.
            So then if the first firing goes well (I'm sure it will), I'll be loading up a bisque firing! It will have swirl bowls, dragons, dragon egg vases, and the dragon pendant mold in it, as well as test tiles. The dragon pendant mold will be finished and ready to use after the bisque, while the other things will have a glaze firing to cone 6 before they are finished.

Wednesday, October 17, 2012

More kiln pictures!

            This morning I got up and went into the barn to put my kiln back together. It was pretty easy to do. Here are before and after pictures:


            Also, since I didn't take any pictures of the giant box yesterday, and it was irresistible to play with it, here is a picture of me and Dandy with the box the kiln came in.


            Did you ever make box forts when you were little? I did, and I was always wishing for a bigger box. Well, this box would make the best box fort ever; it's huge. I wish I could pack it up and send it back in time to when I was six.

Wednesday Traveling Dragons

            This week the dragons have something new to explore! They have to check the new device all over to make sure they can allow the next dragons I'm making to be put in there.


Tuesday, October 16, 2012

The kiln has arrived...

            And it is beautiful! It's so shiny I could use it as a mirror:


            Yes, that is a picture of the side of the kiln. I was a little amazed at just how shiny it is. The kiln came in a really big truck. The truck driver pulled up to me running out the door and jumping up and down waving at him. I'm sure that made it obvious he'd found the right house. He backed the truck into the driveway to get it closer to the barn door:


            The truck driver declined to be on camera, but that's all right. He was very friendly and helpful. That great big truck only had a couple of boxes in it, and one of them was my kiln! The truck had a lift gate to lower the kiln to the ground, and then the truck driver rolled it across the lawn on a dolly. Thankfully the rain had stopped minutes earlier, so we weren't getting wet, and neither was the precious box. (We had a tarp ready to go just in case.)
            My wedging table, which is actually an old door set on top of two cinder blocks, was used as a ramp from the lawn into the barn-studio. It got kinda muddy, but that's not unusual for a wedging table! I'll have to clean off the grass before I use it again.
            The kiln was set down right in front of its final location. I was going to take a picture of the giant box, but we got excited and tore all the packaging off of it before I remembered I had my camera with me. Sorry!
            This is the kiln, still sitting on the pallet mere minutes after it arrived:


            What's that contraption on the backside of the kiln? That's the fancy "one-finger" lid lifting device that Cone Art makes. Here is Mr. Riverdragon demonstrating:


            His verdict? "It gave my finger a work-out, but it's not that hard." My verdict? It's much nicer on my back than the kilns I'm used to. I didn't choose the kiln based on the lid lifter, but I'm happy to have it. My back has enough problems on its own!
            Here's the inside of the kiln. Aren't those nice, clean, undamaged bricks lovely? I'll have to take good care of them.


            One thing that makes me very happy to have a new kiln rather than an old kiln is this blue box:


            Kiln sitters are ok, they work fine when they work, which is most of the time really, but.... it's just super nice to be able to program the kiln. I'm not planning to leave it unattended, but this way I don't have to worry about minding it so much.
            So that is how the kiln arrived. The next step is to get it to the right spot. The kiln weighs something like 300 pounds, so two small people aren't really able to just pick it up and put it down where we want it. Instead, I sat down with my handy dandy instruction booklets to figure out how to take it apart.


            Cone Art actually makes it pretty simple to take the kiln apart. It's mostly a matter of unscrewing a bunch of screws and unplugging some wires inside the control box. It took me maybe a half hour, but I bet it would take me ten minutes now that I know how to do it.


            This is the inside of the control box after I removed it from the side of the kiln. I'm pleased that it's easy to look at it and understand which wires are for what (with a little help from the diagram in the manual). I didn't feel at all worried about tinkering around with it when I was taking it off:


             The bottom half of the kiln was still kinda heavy, but entirely lift-able for the two of us. It has handles on the sides that made it easy to move onto the stand. We leveled the stand before putting the kiln on it. This is the bottom half of the kiln on the stand in its final position. You can see some wires where the control box goes:


            And then our fingers got cold. You can see in the above picture that it was dark out by this time, and the barn-studio gets pretty chilly at night these days. We decided that hot cocoa was in order and called it a day. Tomorrow morning I'll be putting the kiln back together, and then we'll have a picture of the whole thing set up and ready for the electrician! The kiln came with a cord but no plug due to Canadian regulations (Cone Art is located in Canada), so the electrician will have to either put on an appropriate plug or hard-wire the kiln. Either way it'll have its own circuit breaker that is easy to get to in case of trouble.
            Hooray! Thank you, all of you who took part in making this possible! This kiln is going to be a great improvement to my ability to make my work and share it with the world. Thank you for taking a leap and supporting a young artist starting a wild adventure!

Friday, October 12, 2012

News from the kiln front!

           The kiln is almost here! It will arrive at my studio on Tuesday, most likely in the afternoon. Wow! The past month or so has been strange for me. While I've known the kiln was going to arrive at some point, I've had a hard time believing that one of these days soon, I'll be able to wake up in the morning to a cooling kiln with all sorts of exciting things inside. This has made it surprisingly difficult for me to get up every morning and make work. I don't mean nothing is happening, but that it's happening at odd times. Sometimes I work in the morning, sometimes I don't get started until 1 pm, sometimes I work in the middle of the night.
            Having the flexibility to do that is nice, but maybe now that I know when the kiln will actually arrive I'll have a better motivation to 'go to work' in the morning. You see, the morning is my best time of day. It doesn't seem like it before I've had something to eat, but once I engage my brain I do my best work right away.
            I'm very excited that the kiln will be getting here so soon. I will take pictures when it arrives so that you can see. Here's hoping it won't rain on Tuesday!

Sunday, September 23, 2012

Dragon pendant mold, and kiln news

            This morning I finished putting the last few scales on the dragon pendant mold. (A sketch and discussion of this process can be found in this post.) Now it needs to dry in a nice safe place until the kiln arrives. 


            I have counted up everyone's dragon pendant orders, and I'll be making 29 of these this fall. About 60% of you asked for red stoneware (40% porcelain). I have guess-timated that it will take me three days to make all of these if I spend about two hours a day on them. (The rest of the day, of course, I'll be making other pieces.) They will likely be the first thing to ship. This is not to say that you'll have yours in a week, though - first I need to bisque fire the mold, and I will need to fire the final pieces too. 
            The kiln will likely arrive in a couple or three weeks, but the arrival date is still a little up in the air. It's on its way from Canada, and once it reaches the US I will get a call from the distributor. Hopefully they'll be able to give me a clearer date at that point. Once I know when it's going to show up, I can make an appointment with the electrician. Ideally I'd like to get it set up and ready to fire the next day, and then go ahead and have the first bisque right away. 

Thursday, September 13, 2012

Things in the barn-studio

            The barn-studio, being a barn, also happens to have a loft. The loft is sort of the place where I put all the stuff that was in the way when I first started setting up my studio space. It's kind of annoying to get up into it when holding something, because it has a ladder rather than a staircase. But it's nice to have the storage space.
            Anyway, I discovered that taking pictures of the studio below from up in the loft is kind of fun. Here is a picture of my wheel plus the ladder into the loft, and a picture of the kiln area with no kiln, but two cat carriers and a fan.


            It's traditional to have some kind of kiln god or kiln charm to encourage glaze firings to go well. I'm not superstitious, but we just happened to have a horseshoe knocking about, so I gave it something to do.


            This horseshoe was found on the property by Mr. Riverdragon and his mom when they first bought the house. It looks to me like it belonged to a draft horse. There was some attempt to affix it to the outside of the barn, but it never really stayed put. I'm hoping that it can have a better home above my kiln (and that it won't punish me for a poor glazing job by falling on my head).
            I also have a bell now! I hung it just inside the door, and I'm hoping it will ring when it's windy. I like to keep the doors open when I'm working. We'll see whether it's a pleasant companion, or I find it annoying.


Saturday, September 1, 2012

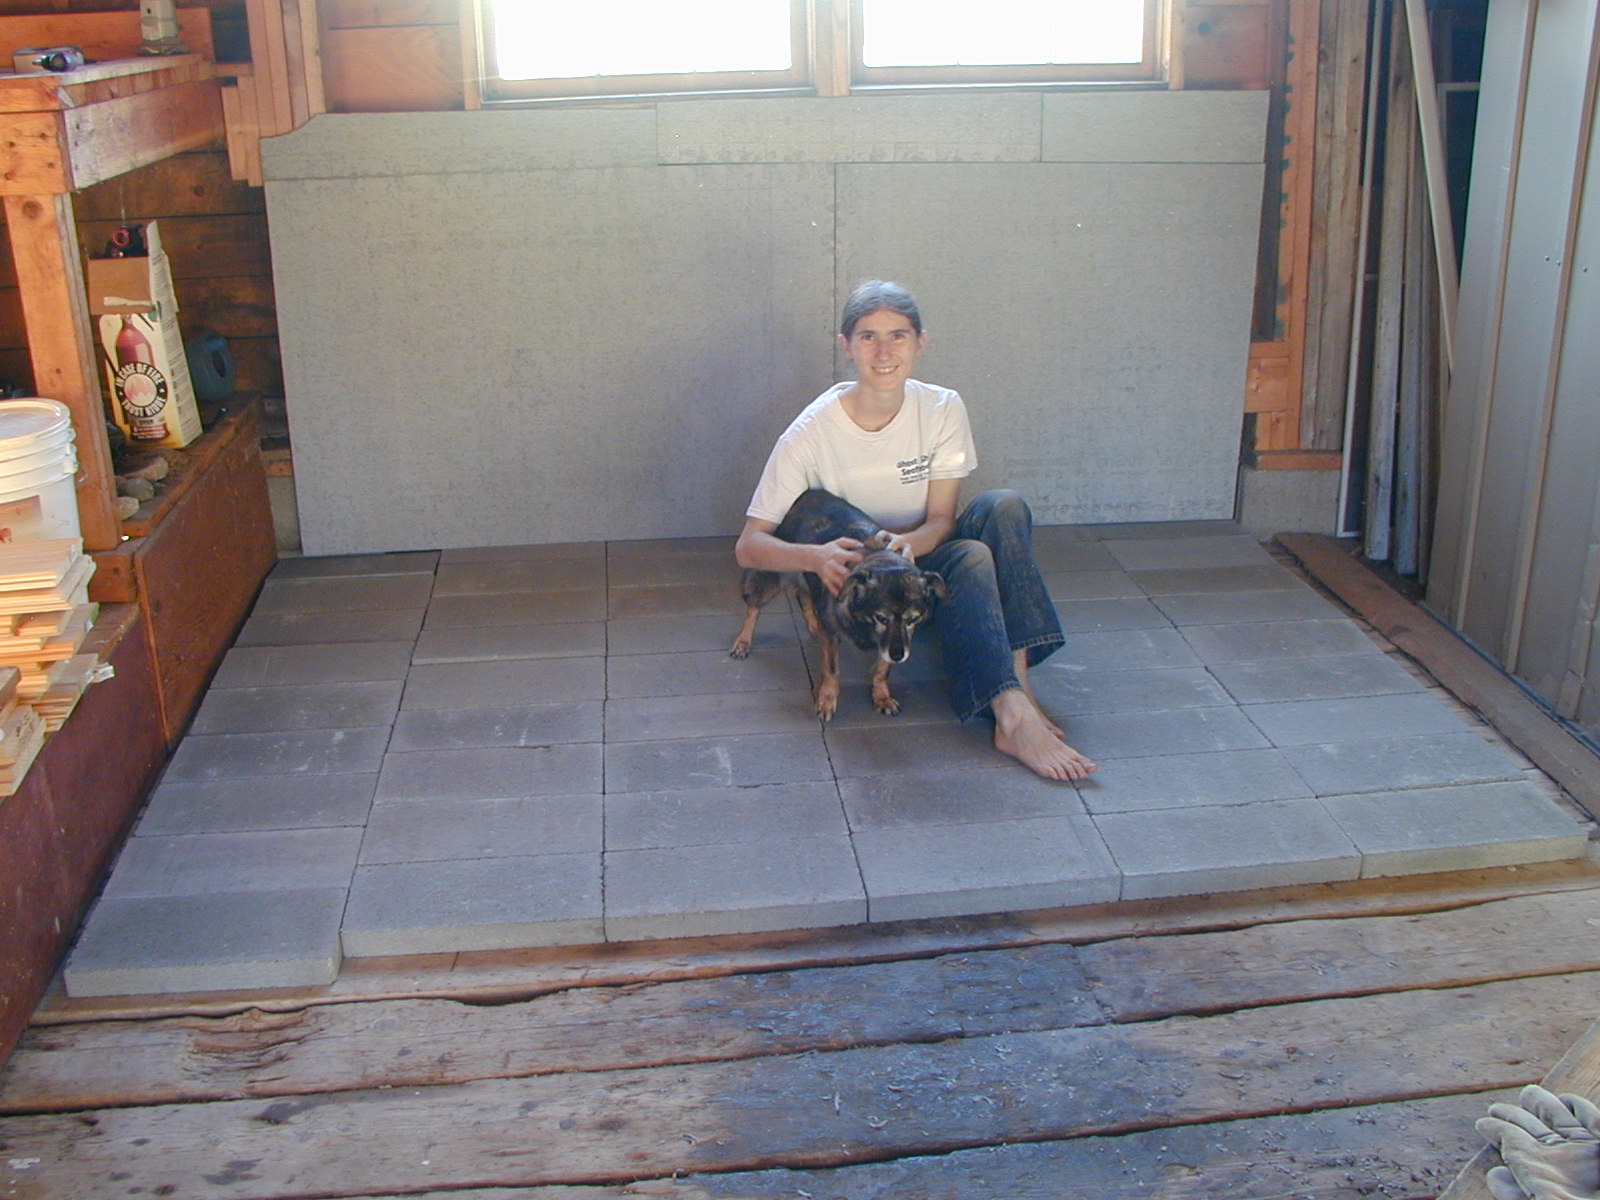
The kiln space is ready to go!

            All it needs is the kiln! Here are some progress pictures. We had to score the cement board with a razor:


            Dandy, my 15-years-and-11-months-old dog, decided she had to see what was going on:


            Really at that part of the process I was wearing more face protection than was necessary, but it was a good idea for the next part:


            For the most part, we were able to get a clean break, although there was one smaller piece that ended up not perfectly square because it refused to cooperate and we got annoyed at it. Here's a picture of me driving the first nail, and then the last nail. Mr. Riverdragon did most of the nails in between.


            Then Mr. Riverdragon took a break and I put down the rest of the cinder blocks. Hooray! All done!


            So if you just imagine that instead of Dandy and me in the middle, there's a kiln, you've got a pretty good idea how it'll look.

Wednesday, August 29, 2012

Fireproofing update: cinder blocks have been acquired!

            Yesterday it rained all day, sometimes drizzling and sometimes pouring, so we waited until today to go pick up more supplies. Nobody wants to lug around concrete blocks in the rain. Today has been nice and sunny, though, so off to the hardware store we went!
            Sweeping! You should always wear a respirator when you sweep in a ceramics studio. Silica is very bad for lungs.


            I wanted to get all the sawdust off the floor before putting down the concrete blocks. The less flammable stuff, the better! Then it was time to unload the car. This is how we got the blocks in and out of the car:


            Then I laid the first block!


            These pictures are a little misleading. They make it look like I did all the work, but we are an egalitarian household here and Mr. Riverdragon put down half of the blocks. He also took the pictures, except the one that has both of us. (That was Mr. Riverdragon's mom.)
            You can see that we aren't finished yet. Those blocks are heavy and we didn't want to overload the car, so we'll be picking up the rest of them in the next few days, and then putting up the cement board on the wall there under the windows. You can expect another update when that happens.

            Wondering why I'm writing about cinder blocks instead of pots? Go look at my Kickstarter project, and then tell all your friends and acquaintances about it! http://www.kickstarter.com/projects/317283323/bringing-the-fire-to-riverdragon-ceramics